This update is different than any other update we've ever released. It includes a new game mode: Exile Escape. This is a completely option addition to Exile and doesn't change the core mod at all. I'll be writing a separate blog on how to setup and run an Exile Escape server. For now, let's talk about all the changes to Exile Mod itself. For a complete list of changes, the Changelog can be found here: 1.0.4 Pineapple
We have added a few of the more popular add-on features directly into Exile. Many of you will think "this is pointless", let me assure you that is not the case. The mods that were readily available for these features were consistently being reported to us by server owners as "causing lag" or "not up to Exile standards".
Therefore, we have added the following to Exile:
SAFE HACKING
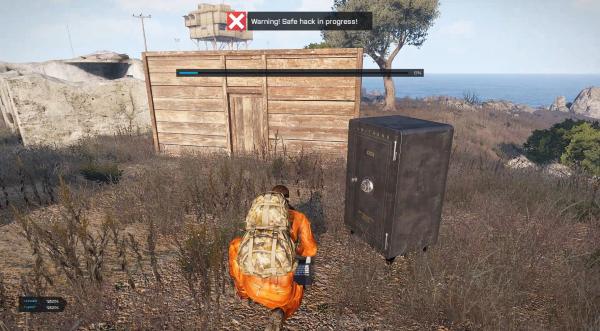
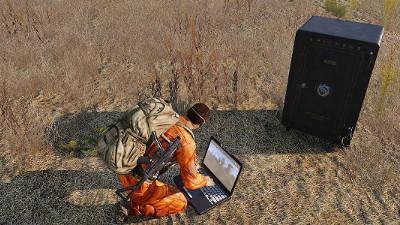
We've added the ability for players to hack any safe. Players need to have a laptop in their inventory and then scroll wheeling on a safe will give you the option to hack it.
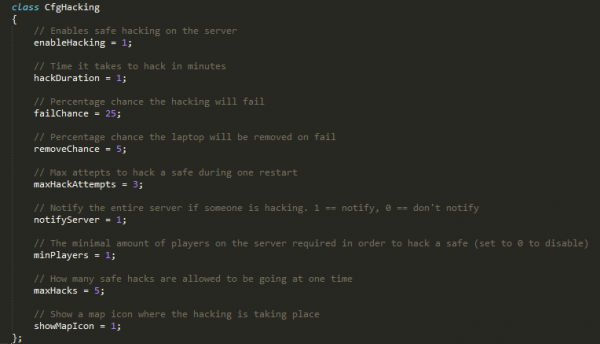
The following are all configurable by the server owner:
- time it takes to hack the safe,
- chance the hacking will fail,
- chance that the laptop will be destroyed (removed from player's inventory),
- max hack attempts per restart on each safe,
- minimum number of players on the server needed to enable hacking,
- number of concurrent hacks,
- if the entire server is notified of the hack, and
-
if the hacking location is marked on the map using this icon

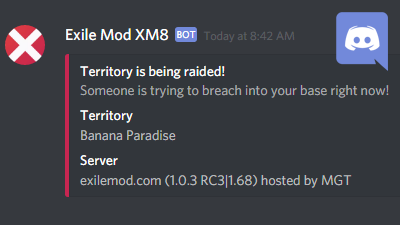
If the safe being hacked is inside a territory, the owners of the territory will receive an XM8 base raid notification if the server owner/player have enabled XM8 notifications.
Server owners can find these config options in the mission file config.cpp under CfgHacking:
LOCK GRINDING
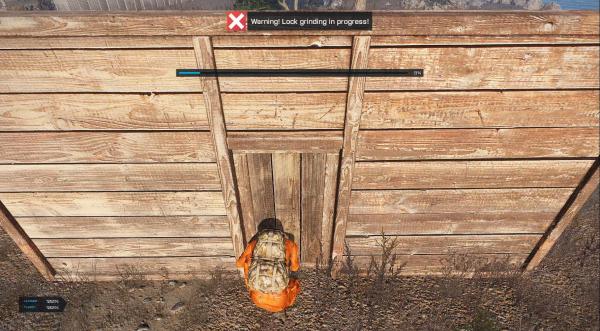
You can now grind base door locks. Players will need to have an Exile_Item_Grinder and Exile_Magazine_Battery in their inventory. Then you scroll wheel on the locked base door and you'll see the option to grind the lock.
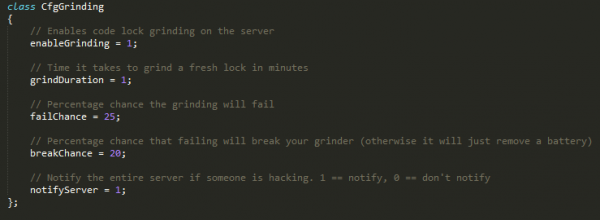
The following are all configurable by the server owner:
- time it takes to grind the lock,
- chance of the grinding failing,
- chance your grinder breaks (items is removed for player's inventory), and
- if the entire server is notified that a door grind is in progress
The owners of the territory will receive an XM8 base raid notification if the server owner/player have enabled XM8 notifications.
Server owners can find these config options in the mission file config.cpp under CfgGrinding:
VIRTUAL GARAGE
Most of you are familiar with various virtual garage systems.
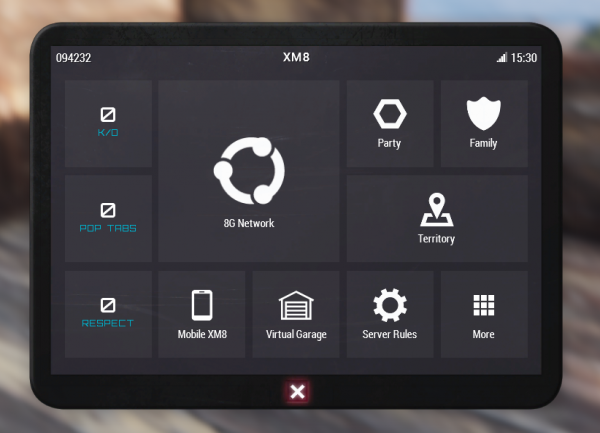
To use Exile's Virtual Garage, while in your territory you open you XM8 and click on the Virtual Garage icon.
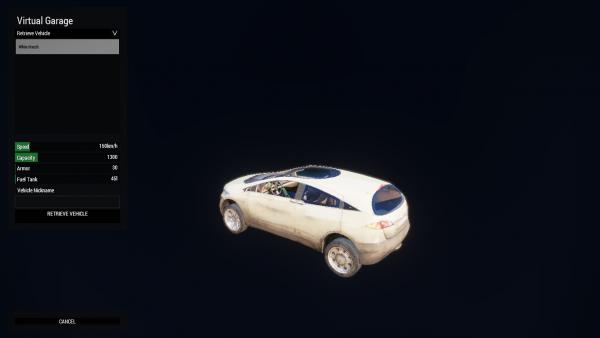
On the drop-down menu, select if you would like to Retrieve or Store a vehicle.
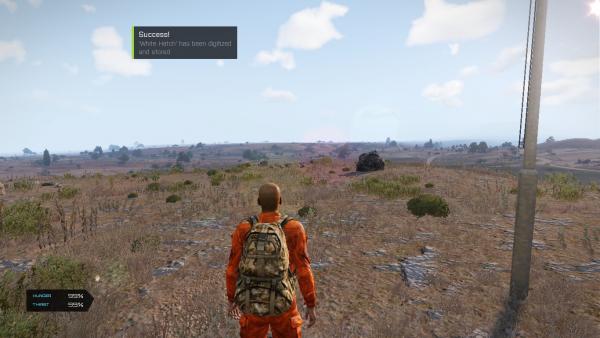
If you select Store Vehicle, your nearby vehicles will be displayed on the list. Select the vehicle you would like to store, enter a Vehicle Nickname, and press the Store Vehicle button.
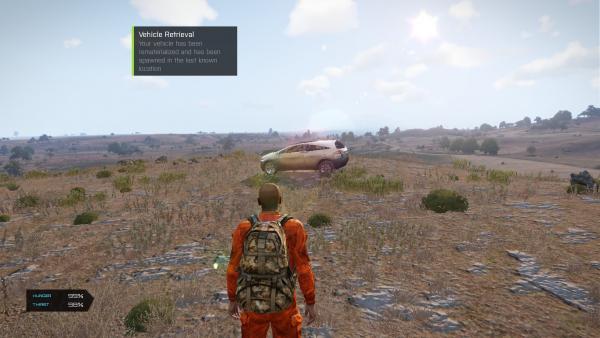
If you select Retrieve Vehicle, your stored vehicles will be displayed on the list. Select the vehicle you would like to retrieve and press the Retrieve Vehicle button.
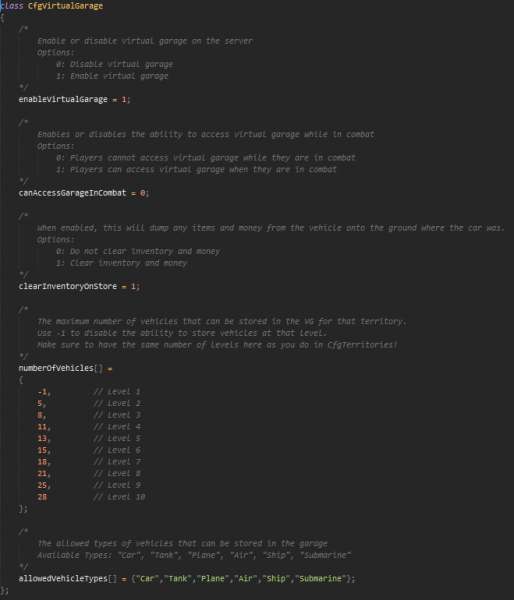
Server owners can find the CfgVirtualGarage config in the mission config.cpp:
*Note for server owners: This should work with vehicles currently stored in the database using ExAd's Virtual Garage script if you run the Exile 1.0.3-1.0.4 sql update query.
XM8 APPS
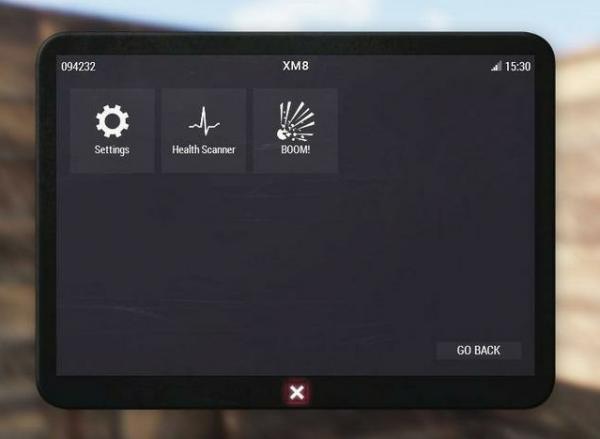
We've now made it even easier to add apps into the XM8. The only difference for players is that all the blank apps have been removed.
Server owners will notice a few things have changed in the mission file. First, there is a new file called "RscDefines.hpp" in the root of the mission file. This file contains all the resource classes required by XM8 apps. Second, in the config.cpp there is a new class called CfgXM8, and fourteen new XM8 app button classes. If you would like to create a new XM8 app, we highly recommend using these classes as all the tedious work has been done for you.
It is now fairly easy to create and XM8 app and doesn't require converting GUI editor exports to funky functions. To add a new XM8 app you need only to do the following:
-
Adding the button
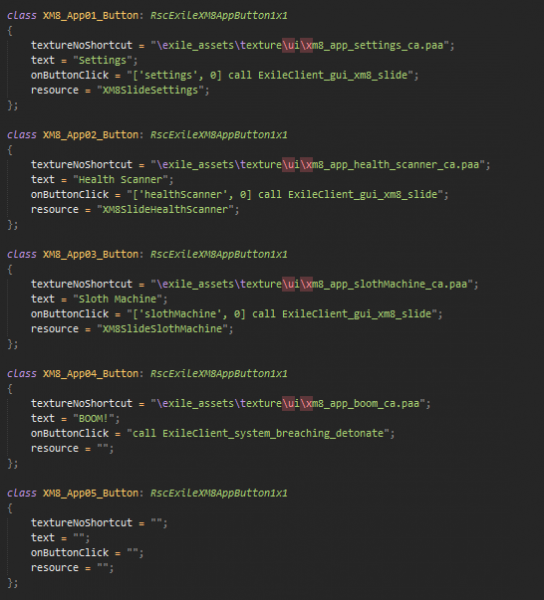
- Modify one of the 14 app buttons located in your mission config.cpp
- textureNoShortcut: The picture to be shown on this button. Can be mission side or client side
- text: The text to show on the button. This cannot be blank or the app will not show-up!
- onButtonClick: The code to run when the app is clicked. You can either open your GUI or run a function. (Like the "BOOM!" app)
- resource: The classname of the resource to be tied to this app. This can be blank if you do not have any GUI. (Like the "BOOM!" app)
-
Resource Creation (Only necessary if you would like a GUI.)
- Go into Eden and open the GUI editor.
- Create the GUI you want, remembering that you have boundaries of the XM8. Use GUI_GRID as your grid position type.
- Give names to your elements and export the GUI as "Config (controls as class)"
- In the mission config.cpp, under the XM8_App buttons, you will see the other XM8 slides. Create a new slide, using one of the current ones as a template and paste the export into the controls class.
- Change the inheritance of the classes to use the XM8 resource classes if you would like. i.e. RscText ---> RscExileXM8Text
- Assign the appropriate IDCs to your classes, giving the Slide class a unique IDC.
-
CfgXM8
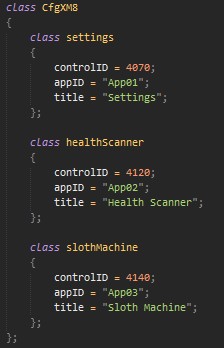
- Create a new class in CfgXM8, and give it a name
- Assign the controlID, the unique IDC tied to the slide class of your resource
- Identify which app this class belongs to by filling out the appID. This is just "App" with the number of the button. If you modified XM8_App05_Button, the appID would be "App05"
- Finally, add a title. This is what will appears at the top of the XM8 when it's opened.
-
XM8_AppXX_Button
- If you haven't already, take the classname of your slide, and put it as the resource attribute
-
Change the onButtonClick to use the slide function of the XM8.
- ['SLIDE_NAME', DIRECTION] call ExileClient_gui_xm8_slide;
- Just replace SLIDE_NAME with the name of your CfgXM8 class that you created above, and DIRECTION with the direction (either 0 for slide right, or 1 for slide left)
TERRITORY RAID MODE
Planting or detonating a breaching charge will now put the territory under attack for five minutes. During that time, players with build rights on that territory cannot do any of the following:
- Place constructions
- Remove constructions
- Move constructions
- Repair constructions
- Upgrade constructions
- Add a lock to constructions
This tackles situations where raid victims go full panic mode and place tons of walls to make raiding impossible or where they remove walls to get sudden fire advantage.
Server owners can change the time a territory is under attack in their mission config.cpp under CfgTerritories > constructionBlockDuration. Server owners who do not want to disallow the above while a territory is under attack can set the config value to 0.
DYNAMIC SIMULATION
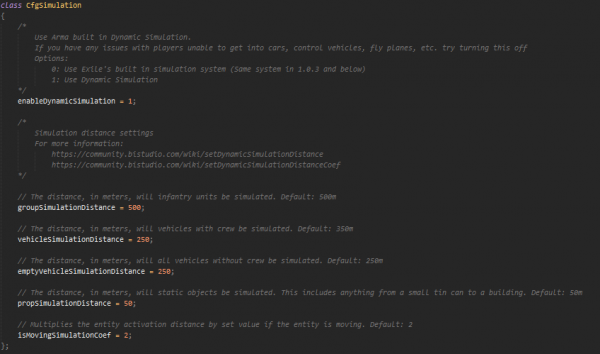
After multiple Arma updates worth of testing, thanks to @MGTDB, we've decided to add Dynamic Simulation directly into Exile. We have not removed Exile's simulation monitor so the server owner can decide which one they would rather use.
Server owners can enable/disable/configure dynamic simulation in the mission's config.cpp under CfgSimulation. By default, dynamic simulation is enabled and configured for a 60 player server.
NEW CONSTRUCTION OBJECTS
The following construction objects were created for Exile by @Andrew_S90.
- Concrete Drawbridge - Exile_Item_ConcreteDrawBridgeKit
- Concrete Floorport (Small) - Exile_Item_ConcreteFloorPortSmallKit
- Concrete Ladder Hatch - Exile_Item_ConcreteLadderHatchKit
- Metal Ladder - Exile_Item_MetalLadderKit
- Metal Ladder (Double Tall) - Exile_Item_MetalLadderDoubleKit
- Wooden Ladder Hatch - Exile_Item_WoodLadderHatchKit
-
Safe (Small) - Exile_Item_SafeSmallKit, Exile_Container_Safe_Small
- Capacity = 175
- PopTabs = 25,000
-
Old Chest - Exile_Item_OldChestKit, Exile_ Container_OldChest
-
Capacity = 2500
-
Capacity = 2500
-
 17
17








Recommended Comments
Create an account or sign in to comment
You need to be a member in order to leave a comment
Create an account
Sign up for a new account in our community. It's easy!
Register a new accountSign in
Already have an account? Sign in here.
Sign In Now